
Meet Laser Studio, the SVG preparation editor I’m developing at 21CNCStudio. Set up your drawing, adjust the fit and arrange the parts before taking the file to your laser software.
Open Laser StudioFree to use, with no sign-in required. Screenshots show the development version; the current interface may differ.
Before cutting
Prepare the drawing for your setup.
A model file still needs a few decisions before it reaches the laser: which lines to cut, how to scale it for the material, where to leave holding tabs and how to fit the parts onto your sheets.
Laser Studio brings those steps into one browser workspace. You open an SVG, inspect the drawing and export a prepared copy. You then set the machine’s speed, power and cutting order in your laser software.
Your drawing and the preparation calculations stay on your device. The current import workflow uses SVG. Keep the original file so you can return to it for a different material or setup.
01 / Understand the file
Give each colour a job.
Open your SVG and check its physical dimensions. If its units or page size came through incorrectly, use the known page width to correct the import before scaling the model.
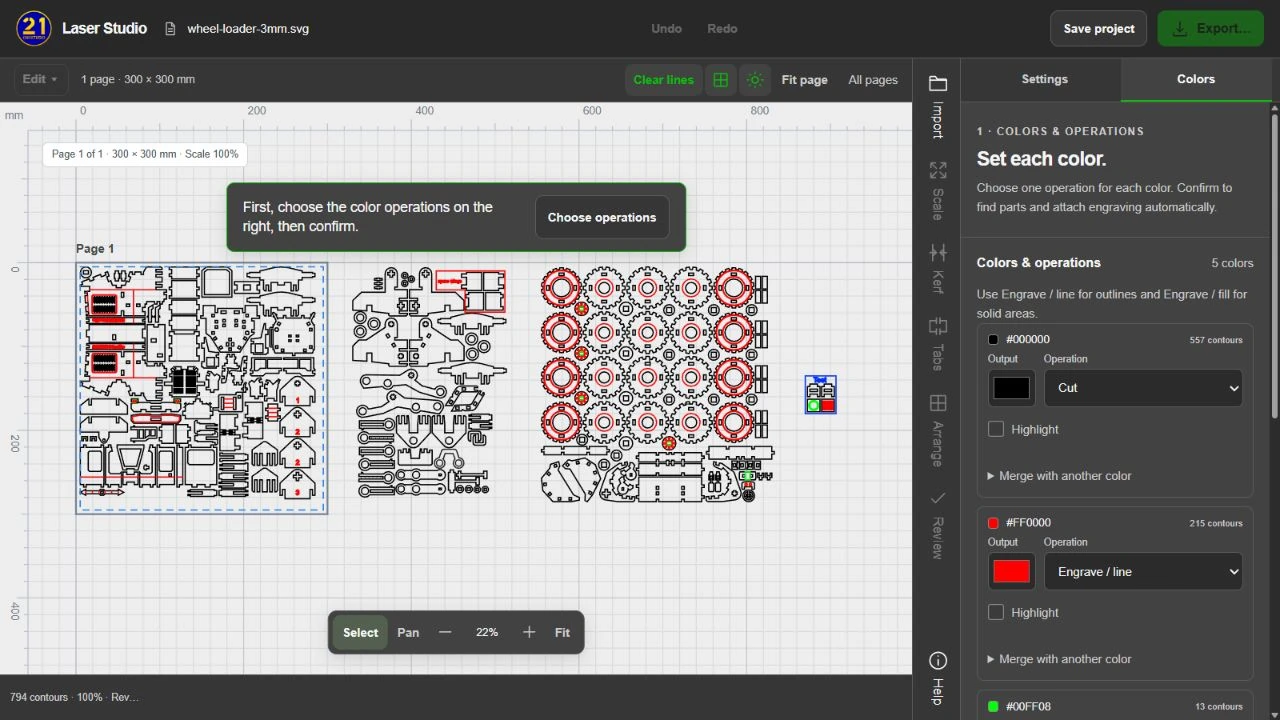
In Colors & operations, assign each colour to Cut, Engrave / line, Engrave / fill or Preserve. You can change output colours and merge colour groups, too. The right choices depend on the file; a red line doesn’t have the same meaning in every design.
Choose Confirm & find parts. Laser Studio identifies complete parts and attaches the holes and engraving it recognises. Check the result in Review, especially any paths that remain separate.
02 / Match the material
Scale the whole model.
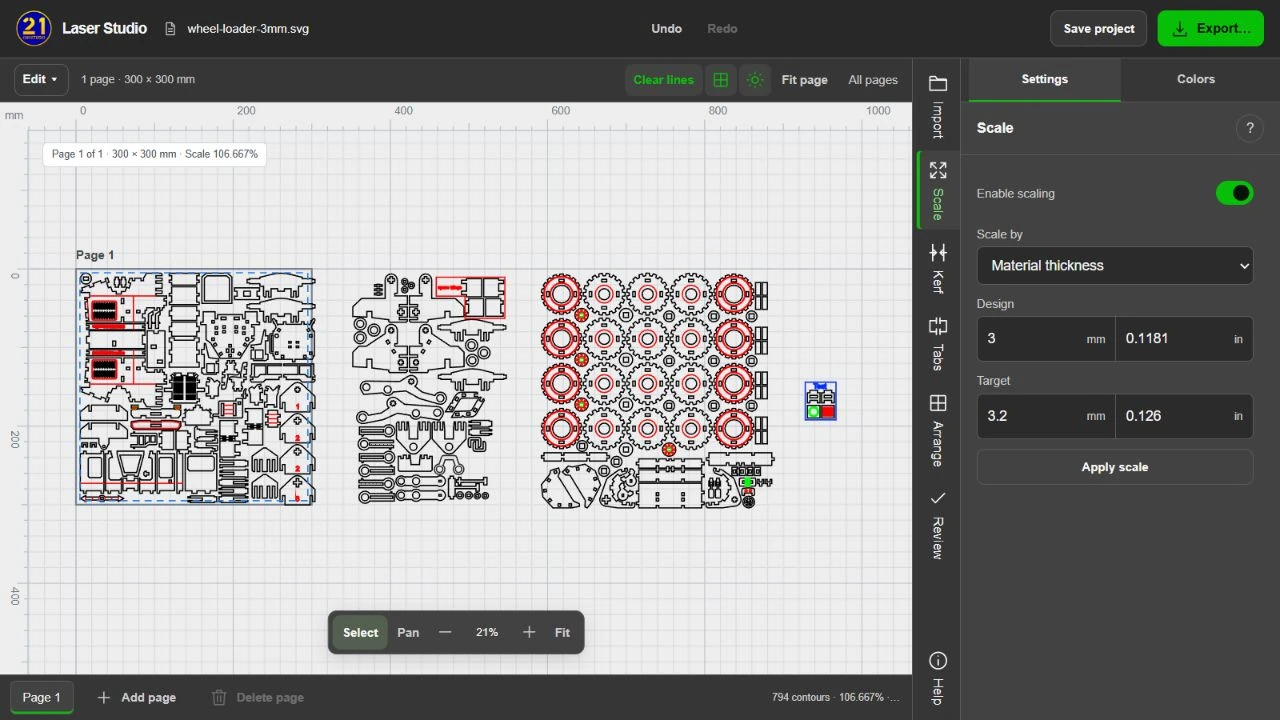
You can resize the drawing by percentage or by material thickness. For the latter, enter the thickness the design was made for and the thickness of the material you plan to use.
For example, moving from a 3 mm design to 3.2 mm material gives a scale of about 106.67%. The slots, holes and engraving scale with the rest of the drawing. The assembled model will grow as well; the working page size stays the same.
Measure the sheet and cut a small joint test before committing to the model. Scaling establishes the material size relationship. You still need to check the fit and the effect of the laser’s kerf.
03 / Adjust the cut edges
Allow for the material the beam removes.
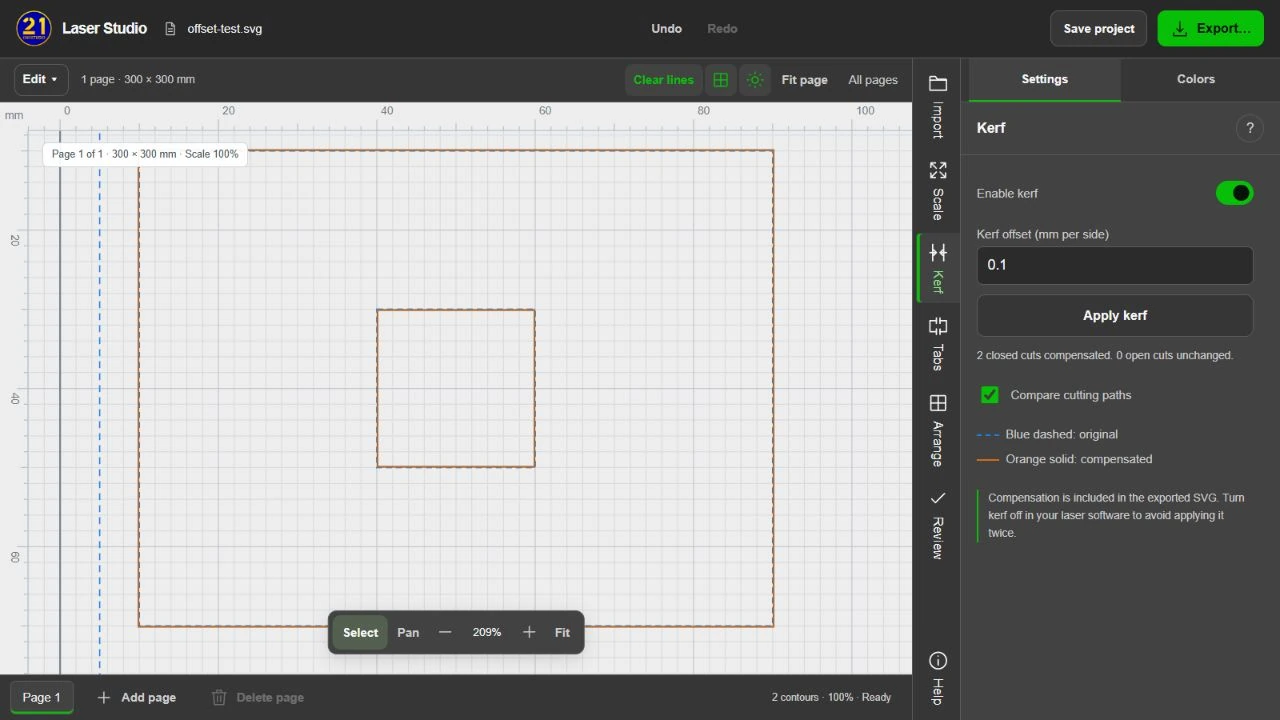
Kerf compensation changes the cutting paths so the laser leaves the edges you need. On eligible closed cuts, Laser Studio moves outer boundaries outward and hole boundaries inward. Engraving and genuine open cuts retain their paths.
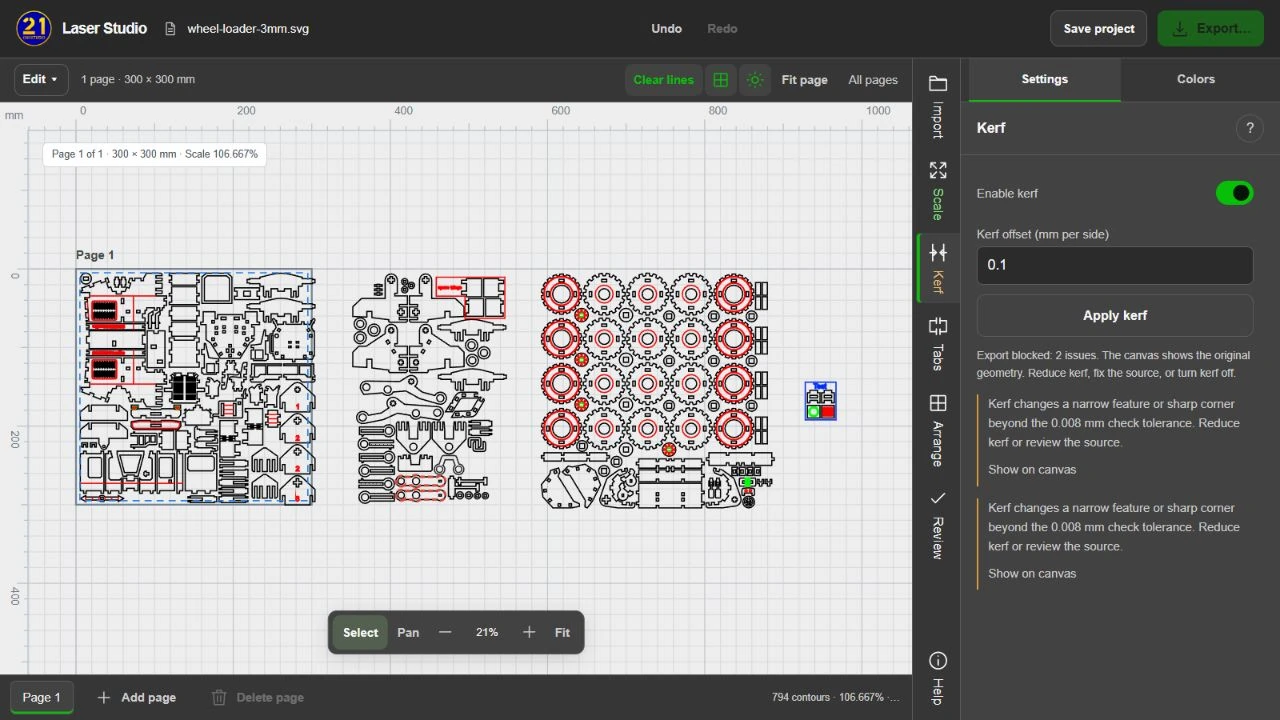
The current development version accepts Kerf offset in millimetres per side. A measured full cut width of 0.20 mm corresponds to a 0.10 mm offset. Use a measured test result for your machine and material.
Turn on Compare cutting paths to inspect the original and compensated outlines. If the geometry check flags a narrow feature or a changed contour, review it before exporting. The kerf guide explains measurement and test fitting in more detail.
Apply compensation once. The exported SVG already contains the adjustment. Set additional kerf compensation in your laser software to zero for that file.
See an example of a geometry check
In this wheel-loader test, a 0.10 mm offset affected a narrow feature beyond the geometry check tolerance. Laser Studio kept the original contours visible and blocked export. Review the highlighted geometry; only reduce the offset if the new value is consistent with your material test.
04 / Keep parts in the sheet
Place the small bridges.
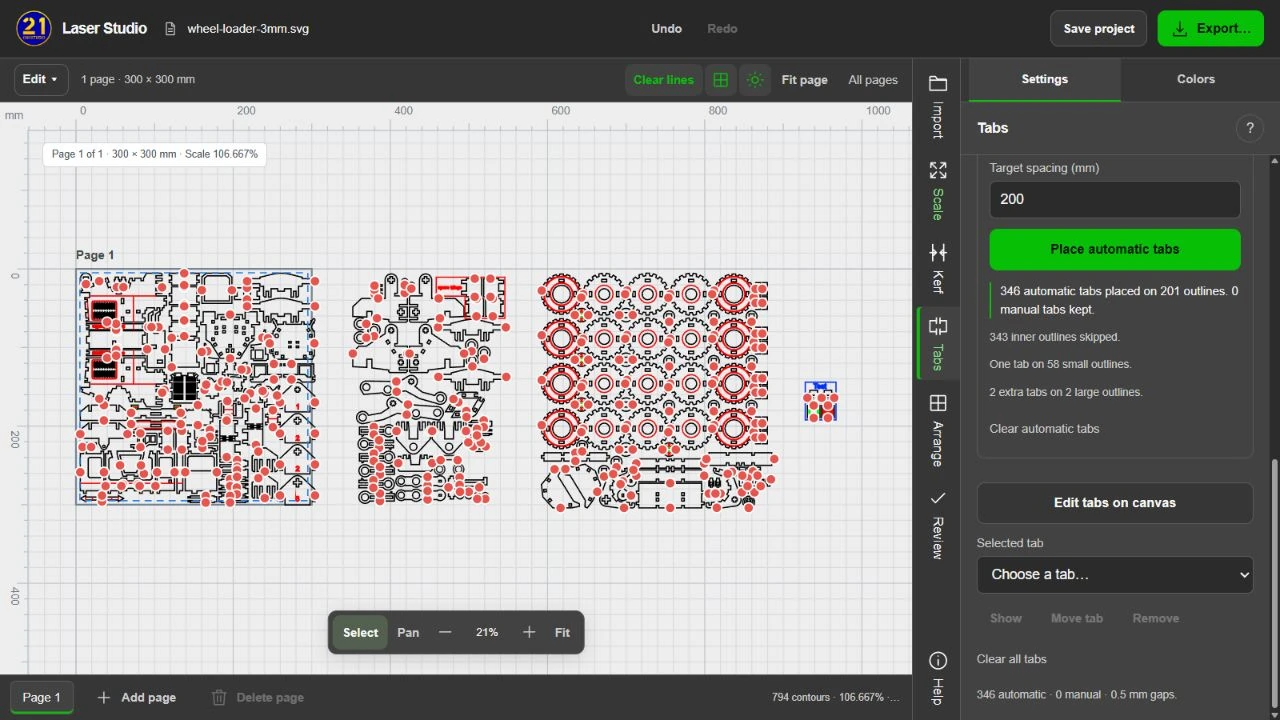
Holding tabs leave short uncut gaps so parts stay attached to the sheet. Set the gap width, then add tabs by hand or generate them using a count per shape or regular spacing.
Automatic placement includes options for skipping inner cutouts, handling small shapes and adding support to larger outlines. You can also choose whether to include recognised outer frames. Inspect the generated positions around joints and delicate details.
Use Edit tabs on canvas to place or adjust individual tabs. Drag a red dot to move it, or double-click to remove it. Manual tabs stay when you regenerate the automatic set. Our holding-tabs guide covers placement and a practical material test.
05 / Use the sheet
Arrange parts with their details attached.
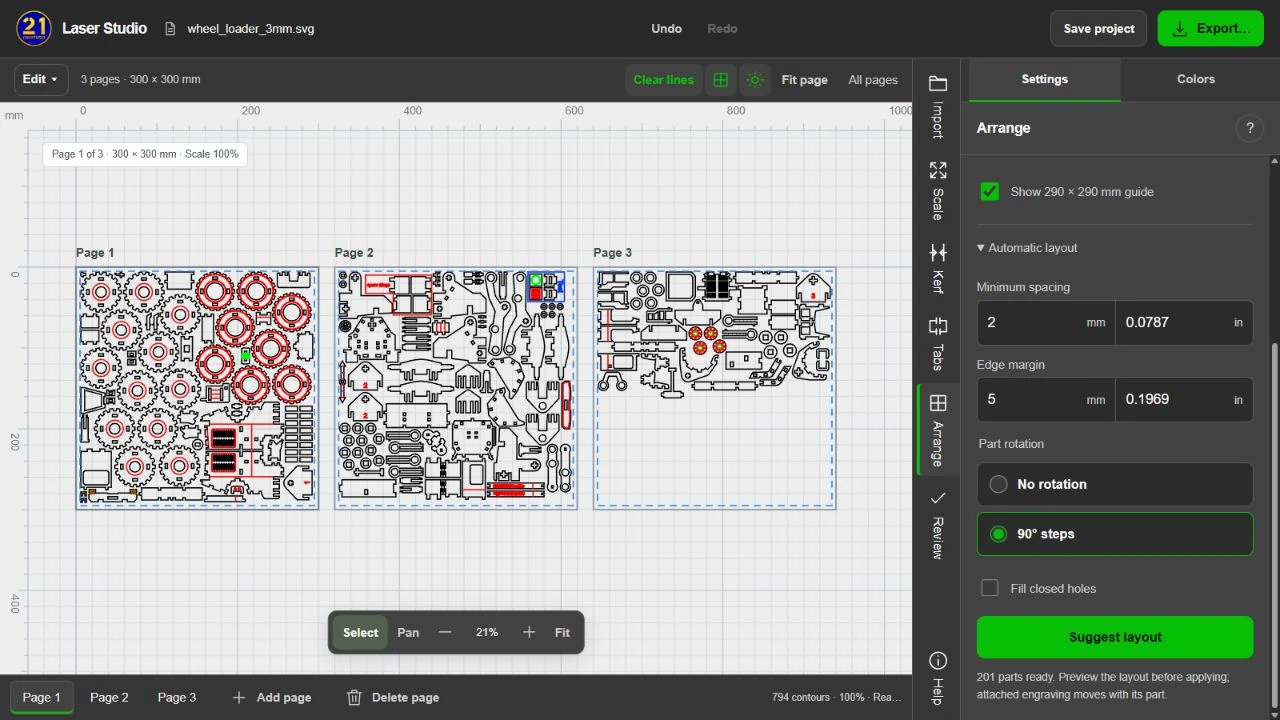
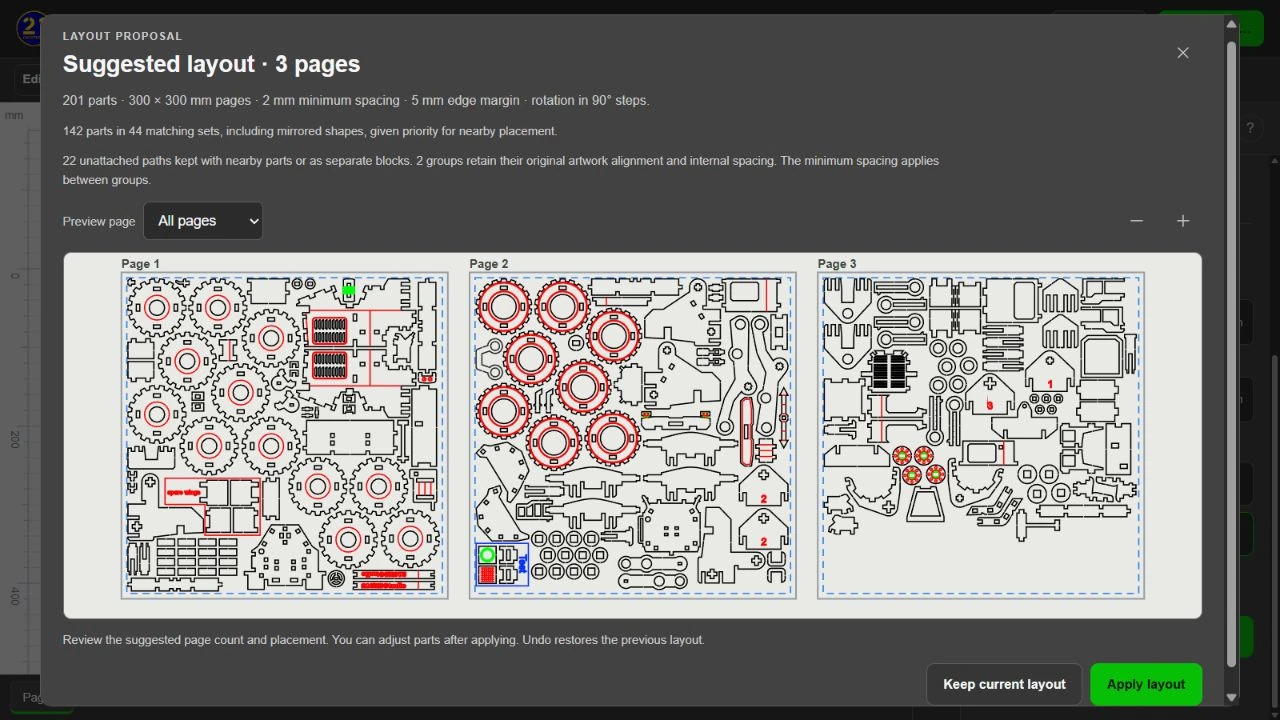
Set your working page width and height, the edge margin and the minimum space between parts. Allow rotation in 90° steps when it suits the drawing, or keep the original orientation.
Choose Suggest layout to see a proposed arrangement and page count. Inspect it before selecting Apply layout. You can move and rotate parts afterwards, and Undo restores the previous layout.
Recognised parts carry their associated holes and engraving with them. Group items that need to keep their relative positions. If a drawing contains enclosing frames, review whether to keep the framed block together or arrange its parts separately.
06 / Keep an editable copy
Save the project. Export the drawing.
Save project keeps the original SVG and preparation settings in an editable .laserprep.json file. Reopen it to continue working with the same parts, operations and tab positions.
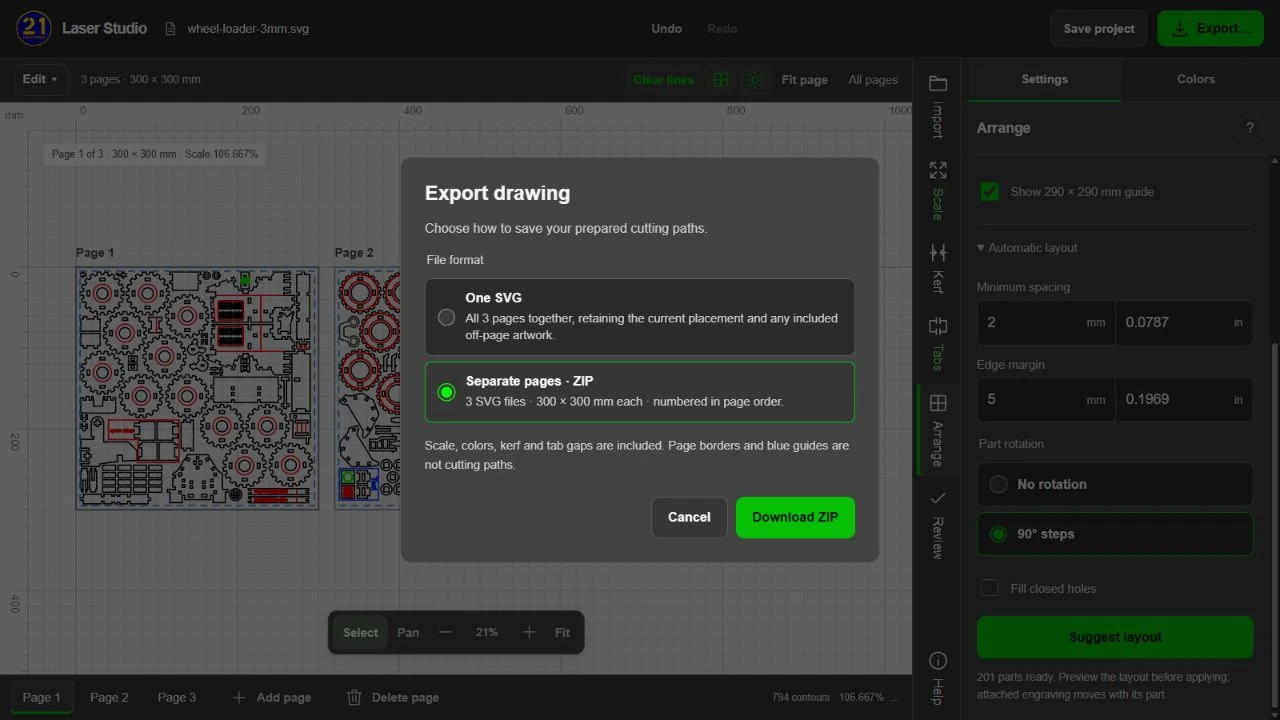
Export produces the prepared SVG geometry. You can save one combined SVG or, when the page checks pass, a ZIP containing one SVG for each working page. Page borders and blue guides don’t become cutting paths.
Open the exported file in your laser software. Check its physical size, layer assignments and preview, then set the cutting conditions for your machine. Keep any existing tab gaps and avoid applying kerf compensation a second time.
Around the workflow
Make the small edits along the way.
You can select, move, rotate, copy and group parts on the canvas. Recognised parts keep their details together. Open a part’s engraving edit mode to adjust attached engraving while keeping its cutting paths locked.
Review the import before relying on automatic recognition. Some files need source cleanup, and text may need conversion to curves with suitable fonts. The editor reports unsupported geometry so you can decide what to correct.
Start with a small drawing and a test cut. Use the preview to check each preparation step before moving on to a full model.
From your workshop
Join the conversation.
Share what worked for you, or leave a question about the guide.
Local preview: comments are saved on this computer.
Loading comments…